Usage
Actually, ECA is processing all enabled models in the background and there is nothing a user needs to do, when everything has been set up. In fact, there isn't anything a user could do to prevent ECA from processing all these models
Attention
Should there ever be a problem, that ECA breaks your site, please refer to the troubleshooting section which explains how to fix that.
How it works
ECA is a processor that works in the background by subscribing to all events on a Drupal site and executing ECA models that define processes for any of those events. There is no UI required for that, ECA just operates based on the available and enabled models.
Recommended setup for production sites
Creating and maintaining ECA models might be a task for your development environment. On the production site, there is often no access to either view or edit those models. If that applies to your Drupal site, you only need to enable ECA and all the sub-modules that are required by the configured ECA models. There won't be any UI and no modeler available for any user on the live site, ECA just operates on the configured models.
Subscribing to all events on a Drupal site may sound worrisome in regard to site performance. We've taken much care to avoid unnecessary overhead and ECA is able to decide very quickly, whether an event is relevant for any of the configured models or not. All information, that's required to make those decisions are stored in cache separately and will only be loaded once for each request, so that the extra processing for each event on top of Symfony's event dispatching is in fact negligible, and we haven't been able to even measure any impact.
ECA model config files
The ECA models have been mentioned a lot, and this chapter explains how those models are stored and describe the structure of their config files. This should help you plan the maintenance and deployment of your own models on all your different Drupal sites.
Each ECA model is a set of 2 config entities, each of which being exported by Drupal's configuration management into a separate file. The config entities (and files) for a single model are named with the following pattern:
eca.eca.[MODEL-ID]: contains all events, conditions and actions that ECA operates uponeca.model.[MODEL-ID]: contains the proprietary model data of the modeler that has been used to create and edit this model
In other words, the config entity eca.eca.[MODEL-ID] is being used by ECA to operate on the Drupal site. The other one
is not needed for that at any time. That second config entity is only required by the modeler, when the model gets
edited. When editing a model with a modeler, ECA will recreate its eca.eca.[MODEL.ID] config entity by converting
the modeler data when the model gets saved by the modeler.
Danger
Always keep the 2 config entities together - ECA always keeps them in sync. And never edit them manually, the eca.eca entity will always be recreated from the eca.model entity.
Having said that, the eca.model config entity contains everything needed to recreate the eca.eca config entity,
should you ever loose that. That implies that you could send the eca.model config entity to someone else only, and
they could load that into their Drupal site which would then recreate the companion eca.eca config entity, if they
had the same modeler available to interpret the proprietary data. More about that below in
Import and export models.
Admin UI
As mentioned above, to let ECA do its work by processing available ECA models, no UI is required whatsoever. Only if you need to maintain your ECA models, the ECA UI is required. Very much like Drupal core has implemented this for the fields and views modules, where the UIs can also be disabled when not required.
When the ECA UI is being required, you can enable it separately:
1 | |
This enables the admin UI which can be found in the admin menu under Administration / Configuration / Workflow / ECA
with the path /admin/config/workflow/eca:
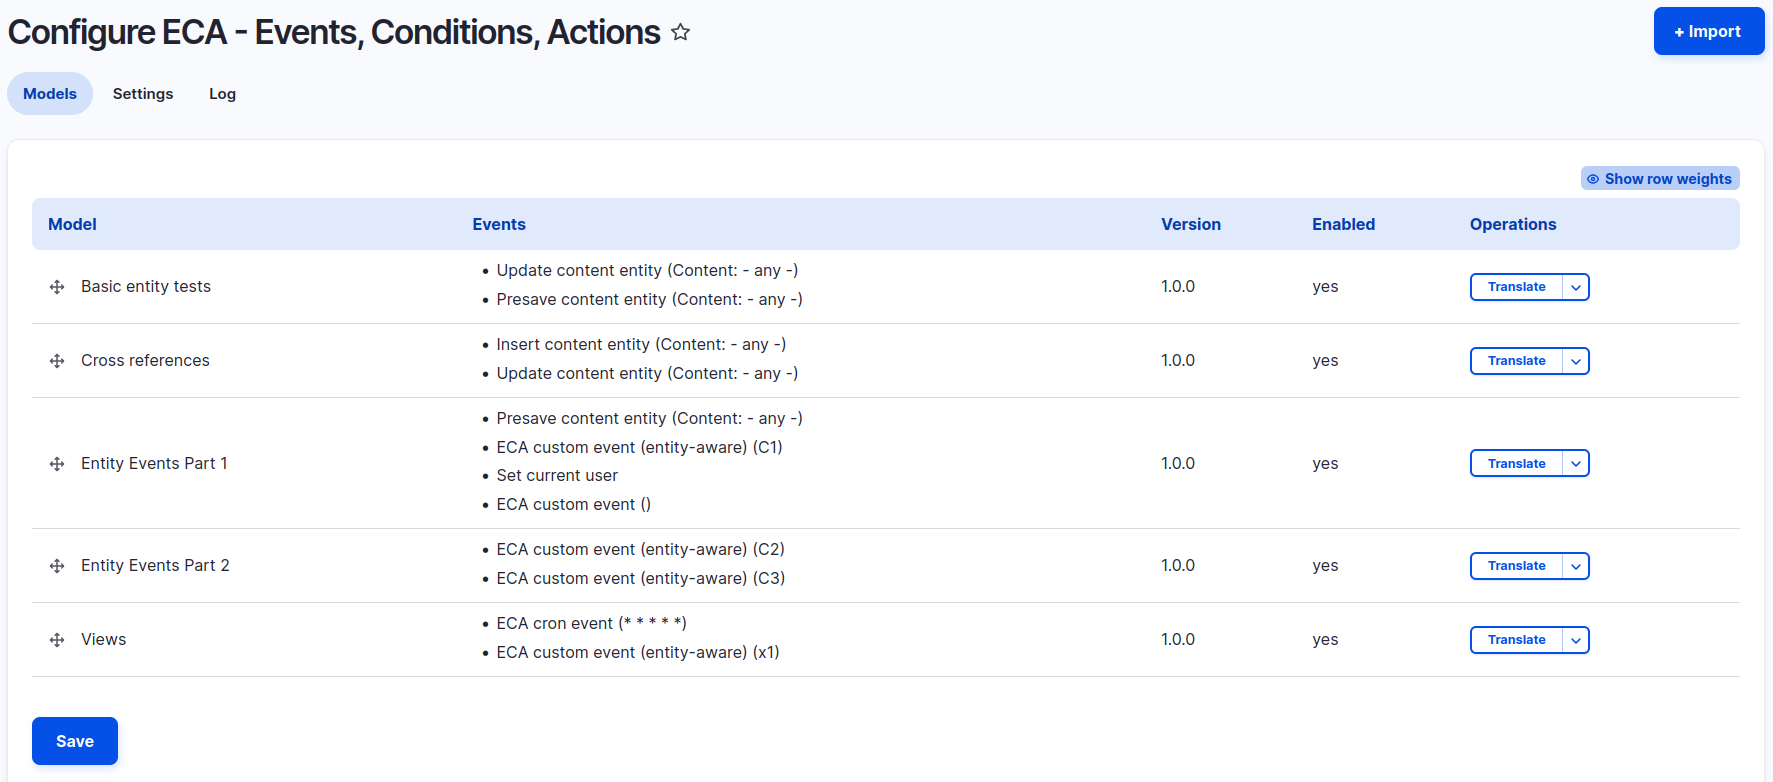
On this ECA admin page you can manage all aspects of ECA: Changing the order of the models by re-arranging them, importing new models and performing operations on each of the available models. That's all described in the chapters below.
Creating and editing models
The ECA admin UI does not provide you access to create new models or to edit existing ones. Those actions are only available, when at least one modeler is enabled which provides support for integrated editing, like e.g. the Workflow Modeler.
Settings
Log level-
Default: Error
Determines, which ECA log messages will be logged to which ever logging backend is enabled on your site. By default, ECA only logs errors or more severe log messages. You can change that to e.g.
Debugto also get much more detailed logs, see also Logs and Debugging. Documentation domain-
Default: https://ecaguide.org
This domain is being used to provide links to the documentation when working with a modeler, and it points to this official ECA guide by default. You can change this to any other domain, if you provide your own documentation, or make this field empty, so that ECA won't display any links to documentation.
Logs
This is only available, if you've also enabled the Database Logging module. It will display all the logged ECA
messages depending on the log level you've configured in the settings. You can filter the messages by
content and/or time range and the list is sorted in exactly that order how the messages got produced.
Each log message for a condition or an action will also contain a list of tokens, that have been available at the time when that component has been evaluated or executed. For more details about token, see Concepts: Token.
ECA model operations
In the list of models, the operations column contains a list of operations for each model, that's available on that Drupal site:
Creating and editing models
These actions are only available, if you have a modeler enabled that supports integrated editing, like e.g. the Workflow Modeler.
Import and export models
Models can be imported by clicking on the Import button in the top right corner. This will open a form where you can
select a file to import. There are actually 2 different file types supported for import:
- an
eca.model.[MODEL-ID].ymlconfig file, see ECA model config files - an archive file (e.g.
[MODELLER-TYPE]-[MODEL-ID].tar.gz) which has been previously exported (see below) or downloaded from the Library
Once you've selected the file and click on the Import button, ECA will validate the file and if all dependencies are
available, import the model and show it on the list of models for further operations.
For a comprehensive guide on all import methods, common issues and troubleshooting, see Importing Models.
To export a model from your Drupal site, e.g. because you want to use it on a different Drupal site, or you need to
attach it to an issue on drupal.org, select the Export operation in the list of models for that model, that you want
to export. This will create an archive with a filename [MODELLER-TYPE]-[MODEL-ID].tar.gz which contains the id of
the used modeler and the ID of the model itself.
Note
It's important to keep that filename as it is part of the validation when later importing that model again.
The exported archive contains 3 or more files:
dependencies.yml: a metadata file containing the names of ECA config entities and a list of required moduleseca.eca.[MODEL.ID].yml: the ECA config entity for processingeca.model.[MODEL.ID].yml: the ECA config entity with proprietary model data- optionally more config entities, if the exported ECA model depends on other config entities
Clone
This will clone an existing ECA model and create a random ID for the new model.
Enable / disable
Only one of those 2 operations is available, depending on the state of each model. Enabled model can be disabled and vice versa. Disabled models will not be processed by ECA, but they remain available on the Drupal site for editing or other operations. Only if you re-enable a disabled model will it be processed by ECA again.
Delete
This will delete an ECA model entirely from the Drupal site.